30 days with FLStudio 20 - Part 11: Instruments Review
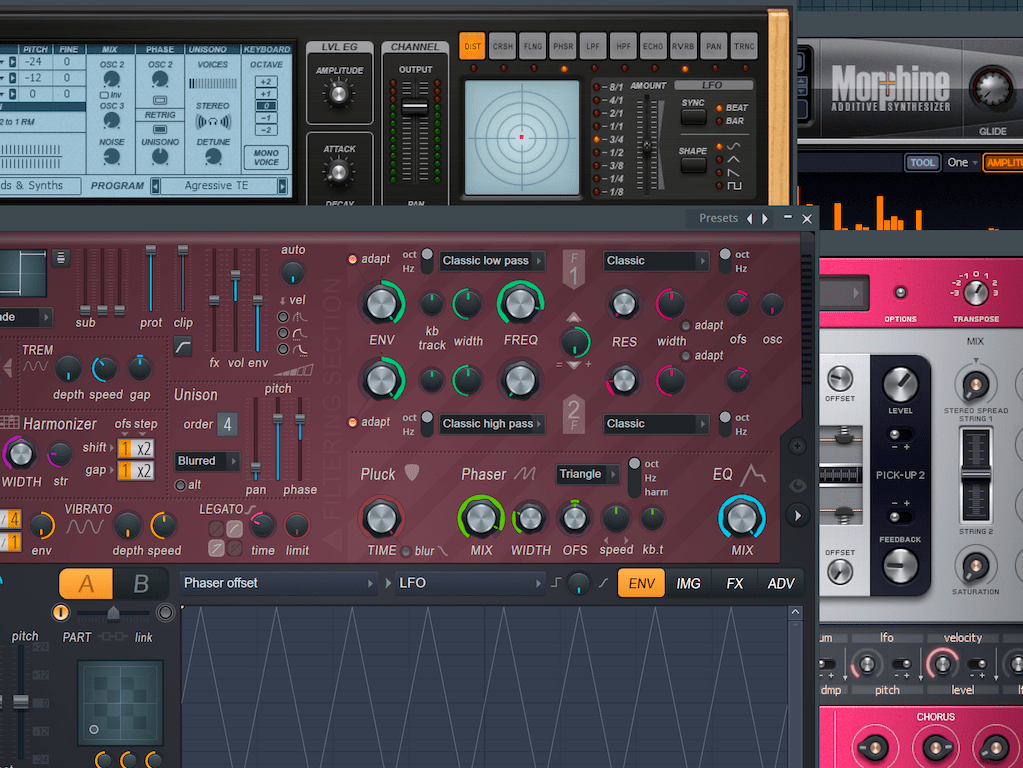
Finally! The penultimate post. All that's left is the conclusion post, but now for a review of every synth available plugin for FLStudio.
I've organized these by category (as listed in FL) and by availability in version of FL.
Unlike the effects post, I'll be giving multiple ratings for different versions.
I will be considering the plugin itself. The envelopes/filters/etc... available on the native wrapper channel I won't consider since these are available to many plugins.
Other posts in this series:
30 days with FLStudio 20 - Part 10: Effects Review
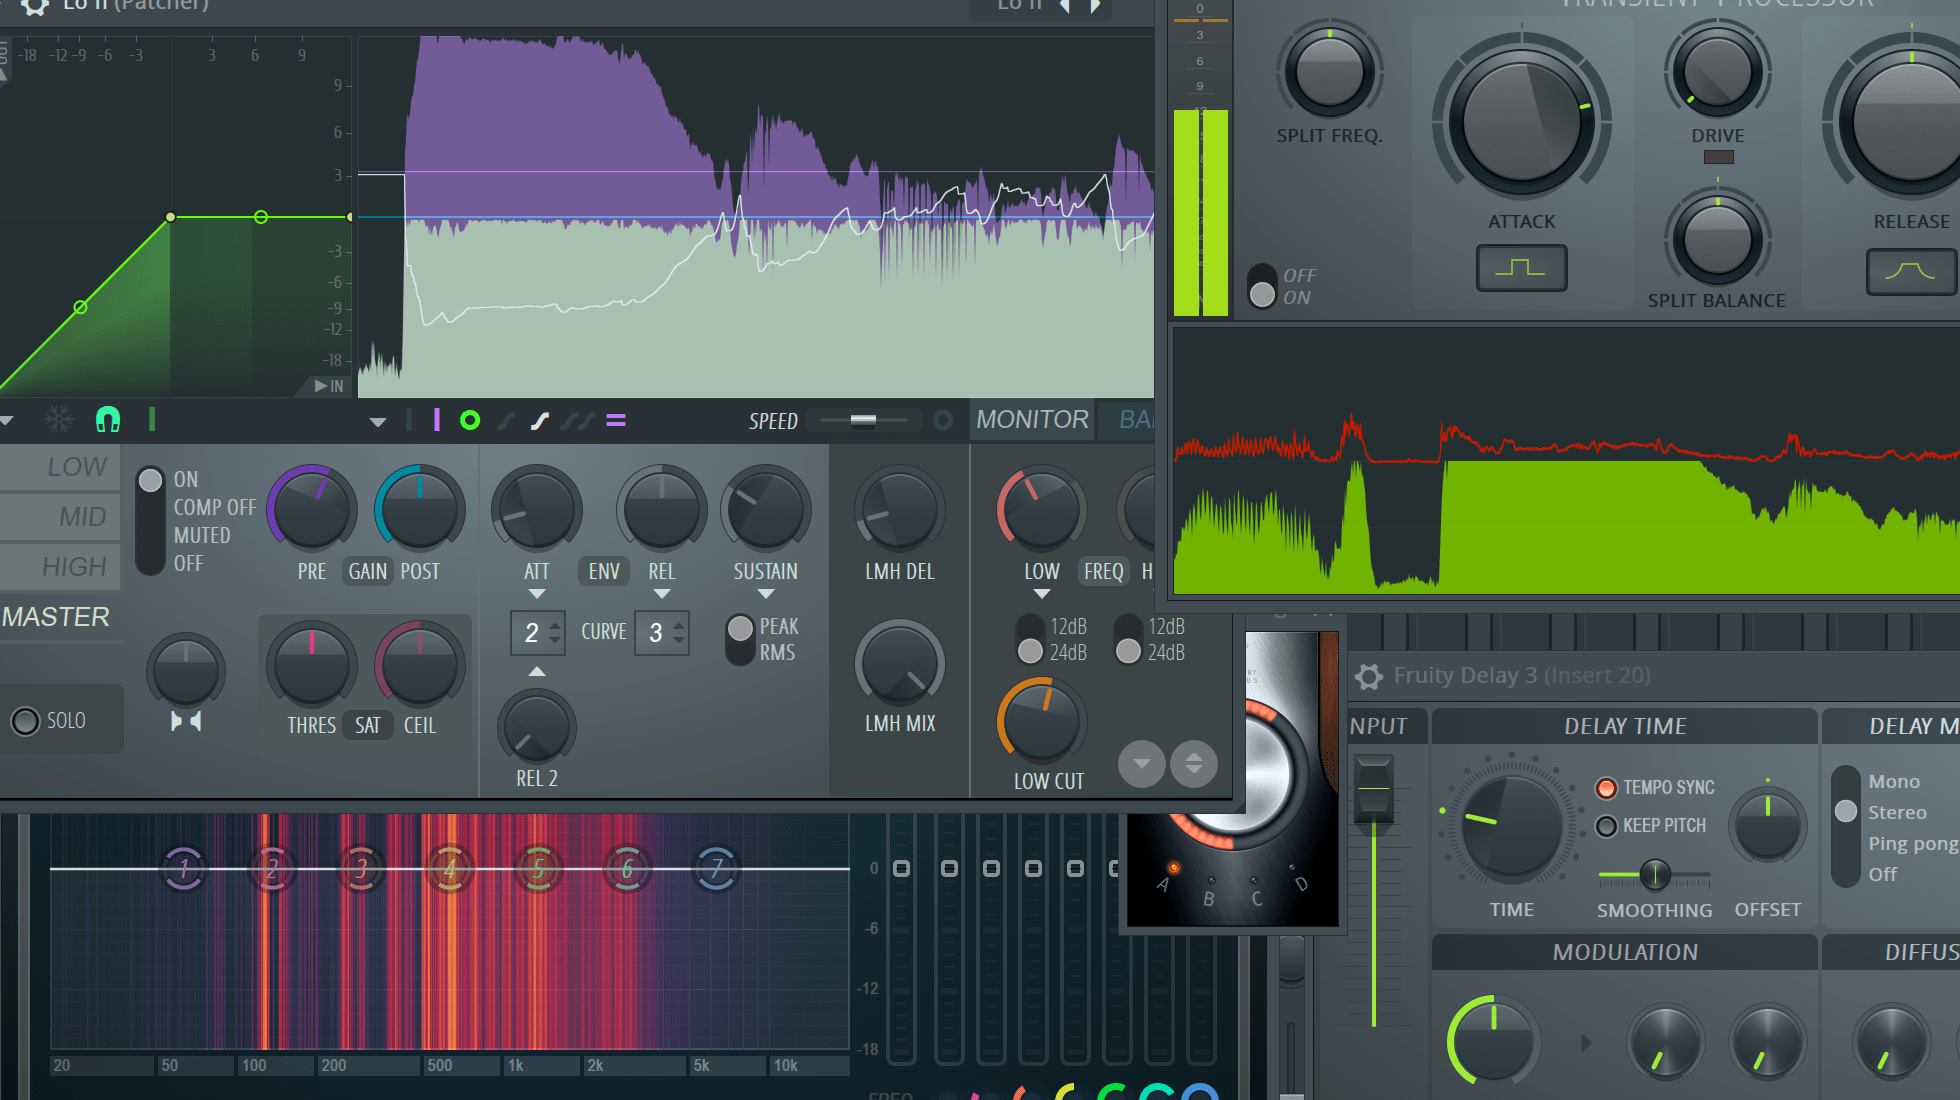
It's time for when I do a mini-review of every single effect in FLStudio.
I'm not going to waste any more time with the foreword. Let's do it.
Spoiler - Overall rating:
Other posts in this series:
30 days with FLStudio 20 - Part 9: Workflow
This is something I rarely discuss, but since FLStudio is so different from other DAWs I want to talk about the topic of workflow.
Make sure you've read the other 8 posts in this so far, since that information will be necessary to fully understand this discussion.
Prepare for a wall of text, since there's no need for many images here!
Other posts in this series:
30 days with FLStudio 20 - Part 8: Performance mode and Video FX
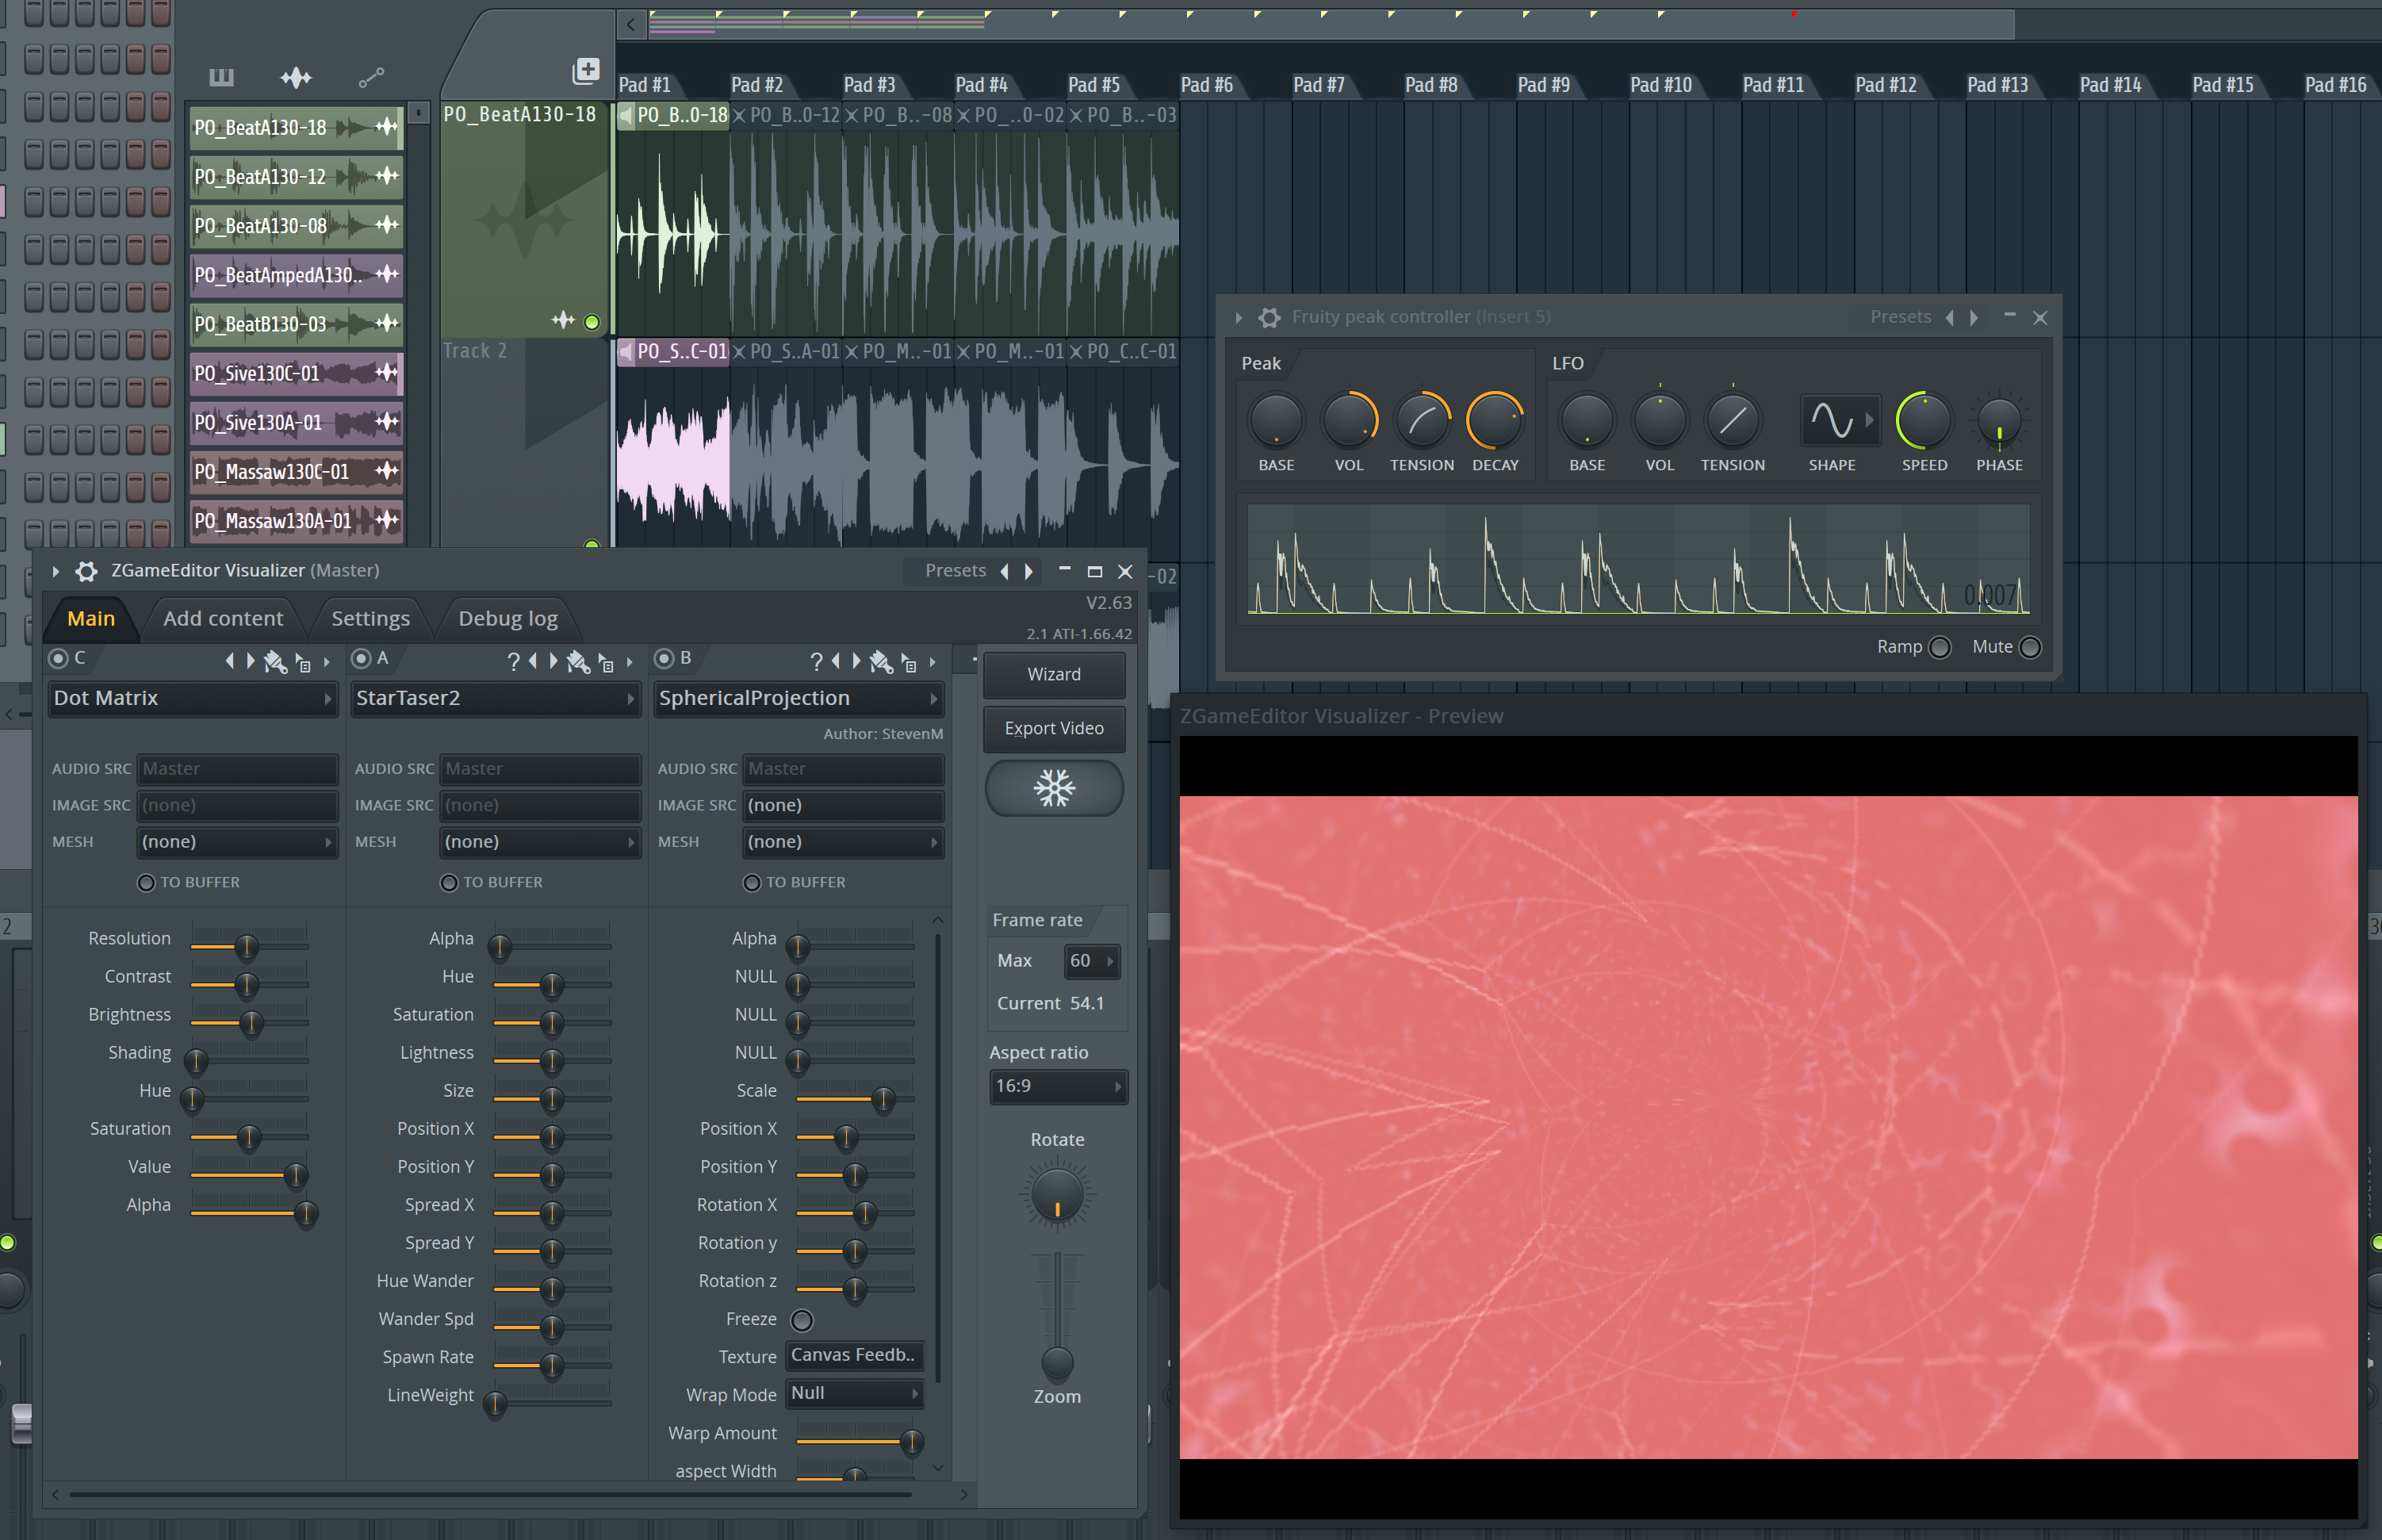
Fans of Ableton Live or Bitwig are going to like this one, as well as anyone that does live performance.
I'll be covering FLStudio's "Performance Mode", which is similar to Live/Bitwig's session mode, and I'll be discussing the Video FX in FL.
Other posts in this series:
30 days with FLStudio 20 - Part 7: Modulation
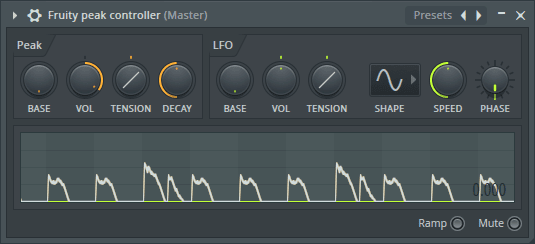
Alright, here we go. This is some fun stuff. Modulation in FLStudio.
What I mean by modulation is automatically changing parameters without link to automation. Such as having a waveform modulate a parameter, or some envelope or other means.
This is a place where FLStudio really shines, and it seems like one of those places that few FL users even venture. They should!
It's equally as awesome as Bitwig's modulators, but for different reasons.
Onwards!
Other posts in this series:
30 days with FLStudio 20 - Part 6: MIDI Controllers
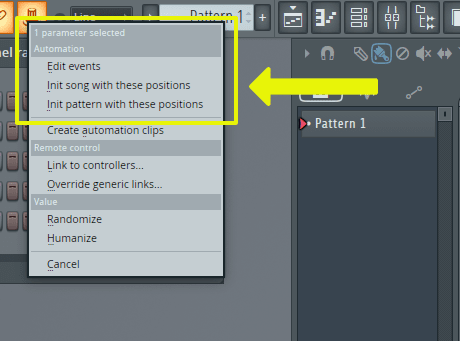
I'll be covering parameter modulation and hardware controllers in the next 2 posts. It may seem weird to bunch these things together, but in FLStudio they are linked (pun intended) together.
I'm going to spoil this article a bit, and tell you that this is one of FLStudio's strong points. Somehow I rarely see people talking about it, or see it used in projects.
Get ready to get modulated!
Other posts in this series:
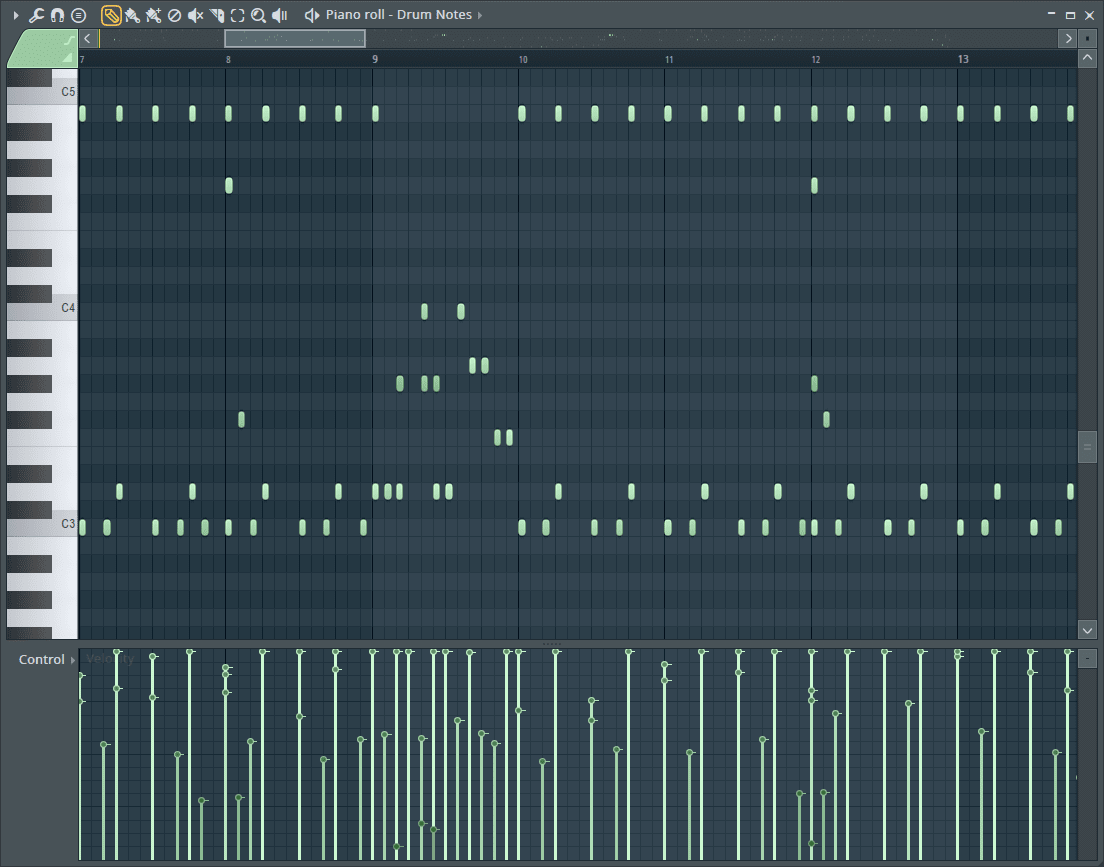
30 days with FLStudio 20 - Part 5: Piano Roll Tools
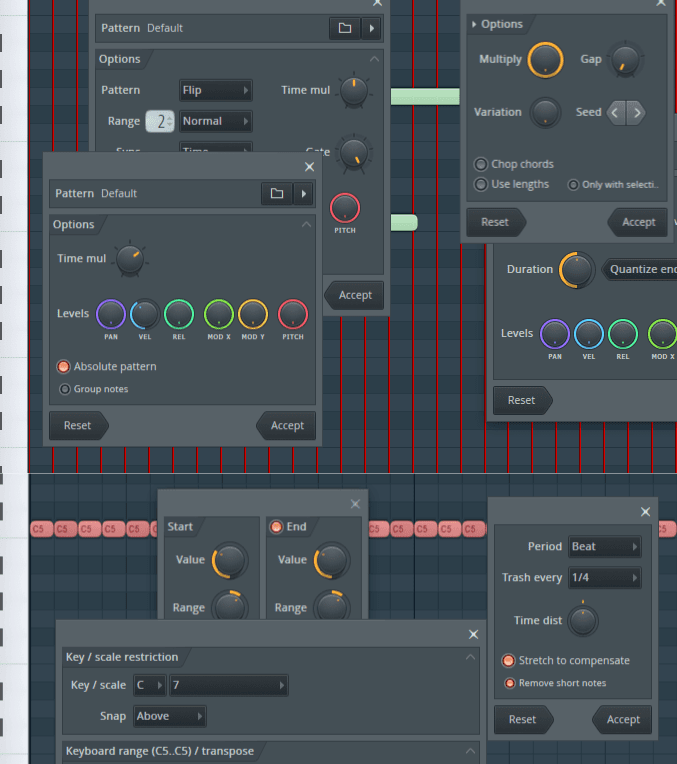
Tools in the Piano Roll. These are things that don't involve necessarily clicking directly in the piano roll, but selecting something else that acts on what you have already or generates new notes.
This is the last in the "Piano Roll" mini-series. Go check out parts three and four for more.
I'm not covering everything about working with MIDI in FLStudio, there's still some things to come. This has just been about the piano roll and surrounding functions.
On to it now...
Other posts in this series:
30 days with FLStudio 20 - Part 4: Advanced Piano Roll
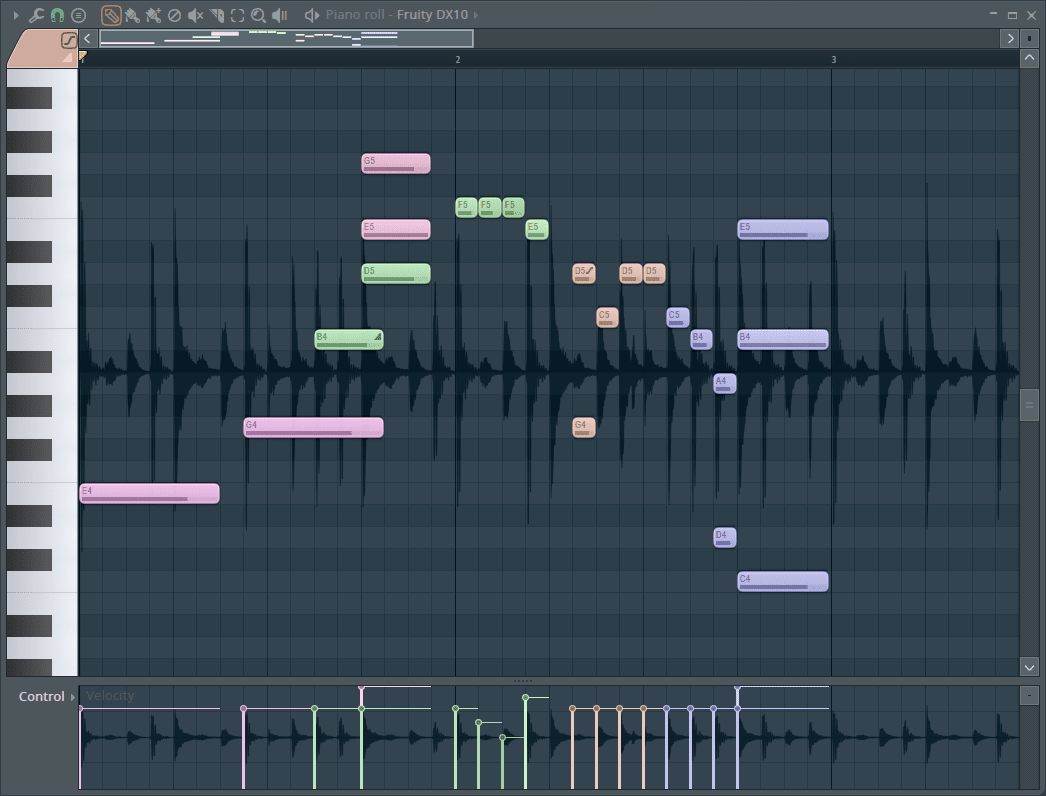
Last time on this episode of "30 days with FLStudio 20" I covered the basic functionality of the Piano Roll. Things like simply adding and removing notes. The bare basics.
This post will deal with what I consider "Advanced" functionality. These are things like dealing with scale colouring, advanced selection, configuration, slides, grid/snapping and more.
There's still another post to go in this mini-series though, so don't think this is everything just yet.
Other posts in this series:
30 days with FLStudio 20 - Part 3: Piano Roll basics
FLStudio's manual has some bold claims in it...
FL Studio's Piano roll has the well deserved reputation as the best Piano roll in the business.
And...
FL Studio has, arguably, the most powerful Piano roll editor available.
If you've read my website much then you know I really rev up when I see claims made about features. I'll be spending this post, and the following 2 posts discussing MIDI editing/entry which is mostly done in the Piano Roll.
To start with, I'm going to cover the bare basics of Piano Roll usage. Is it really the best?
Other posts in this series:
30 days with FLStudio 20 - Part 2: Recording and Editing Audio
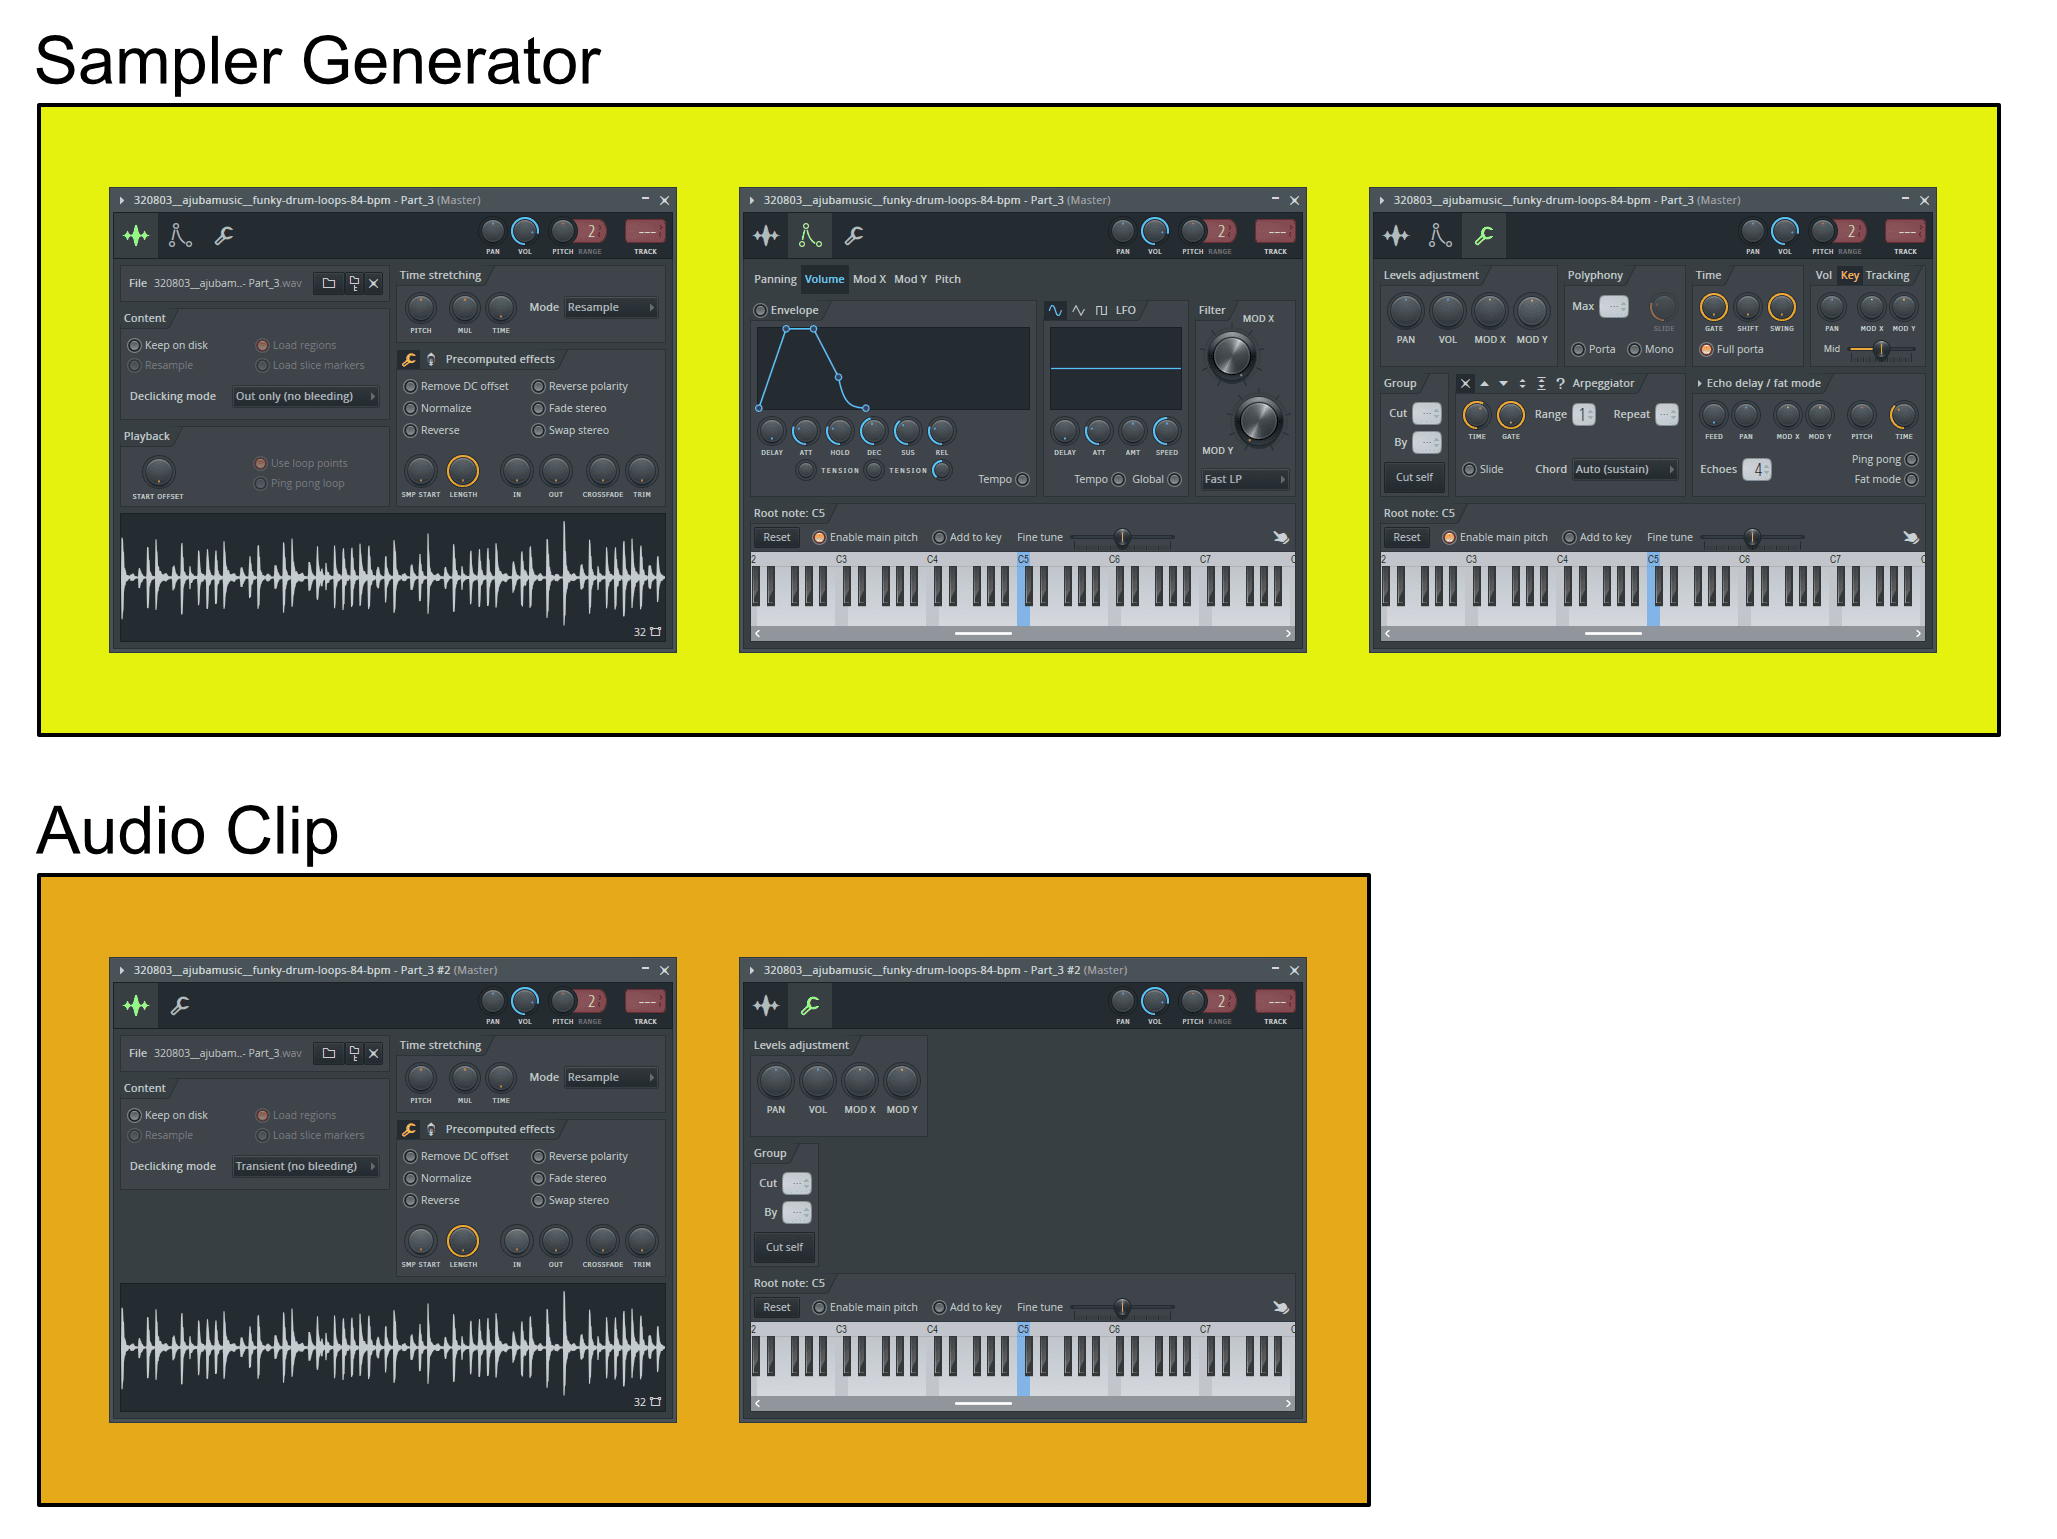
Ok. We're going to start hard here. Audio Recording in FLStudio.
It doesn't exactly have the best reputation for this, but is it deserved? Are there redeeming aspects? Is it really awesome?
Enough talk. Click through for more talk!
Other posts in this series:
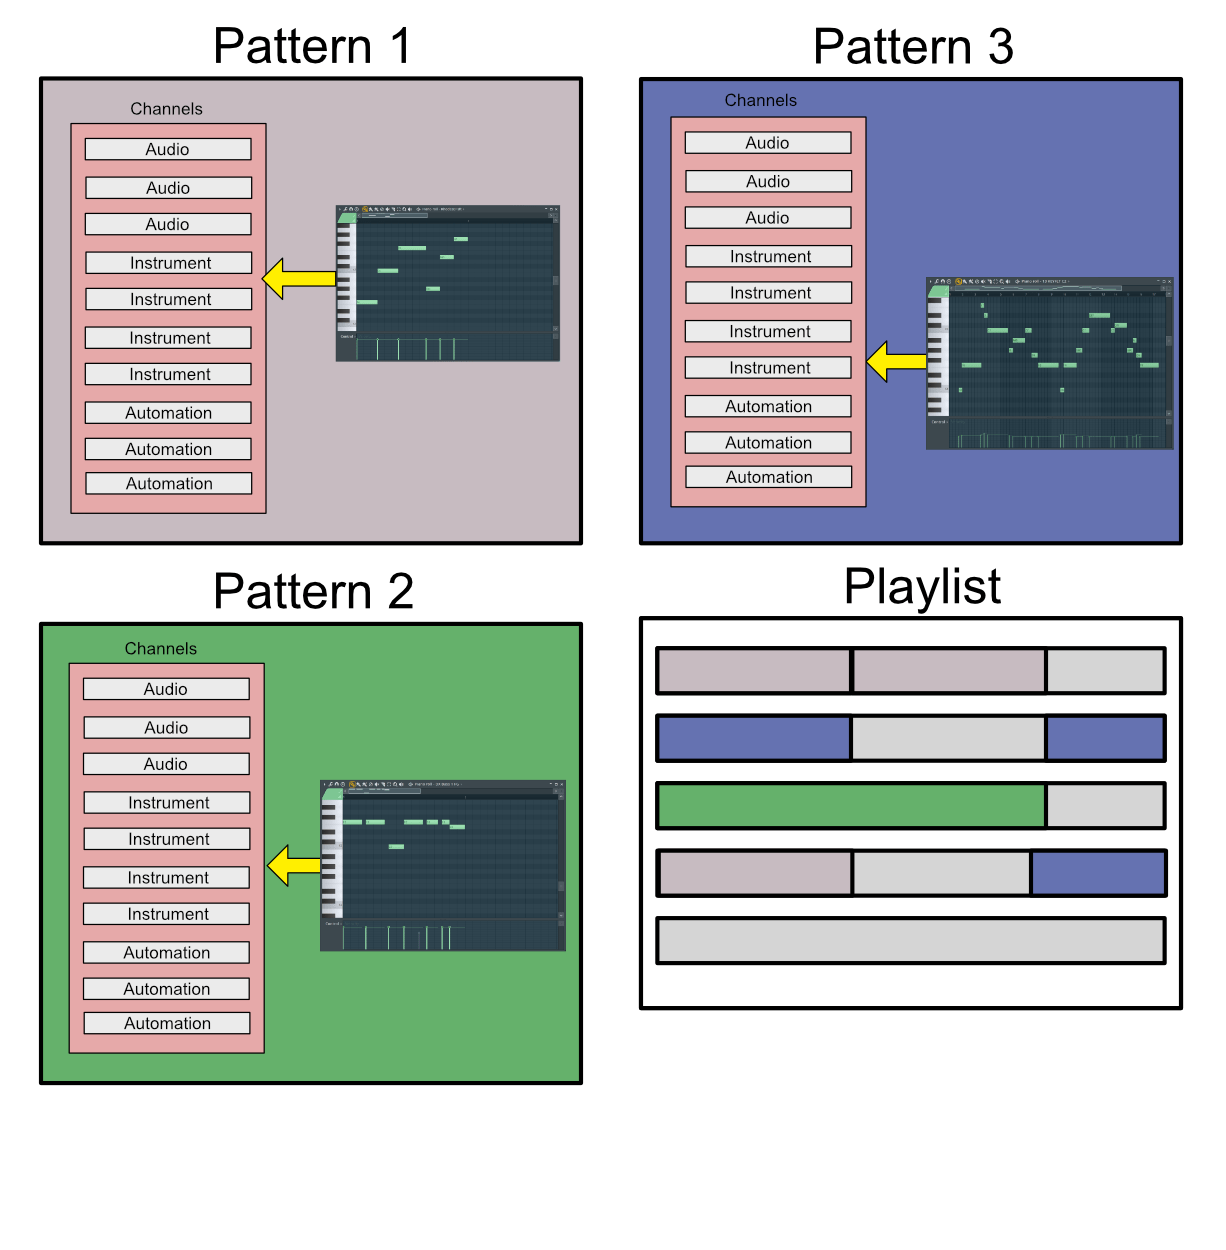
30 days with FLStudio 20 - Part 1: Introduction to FL
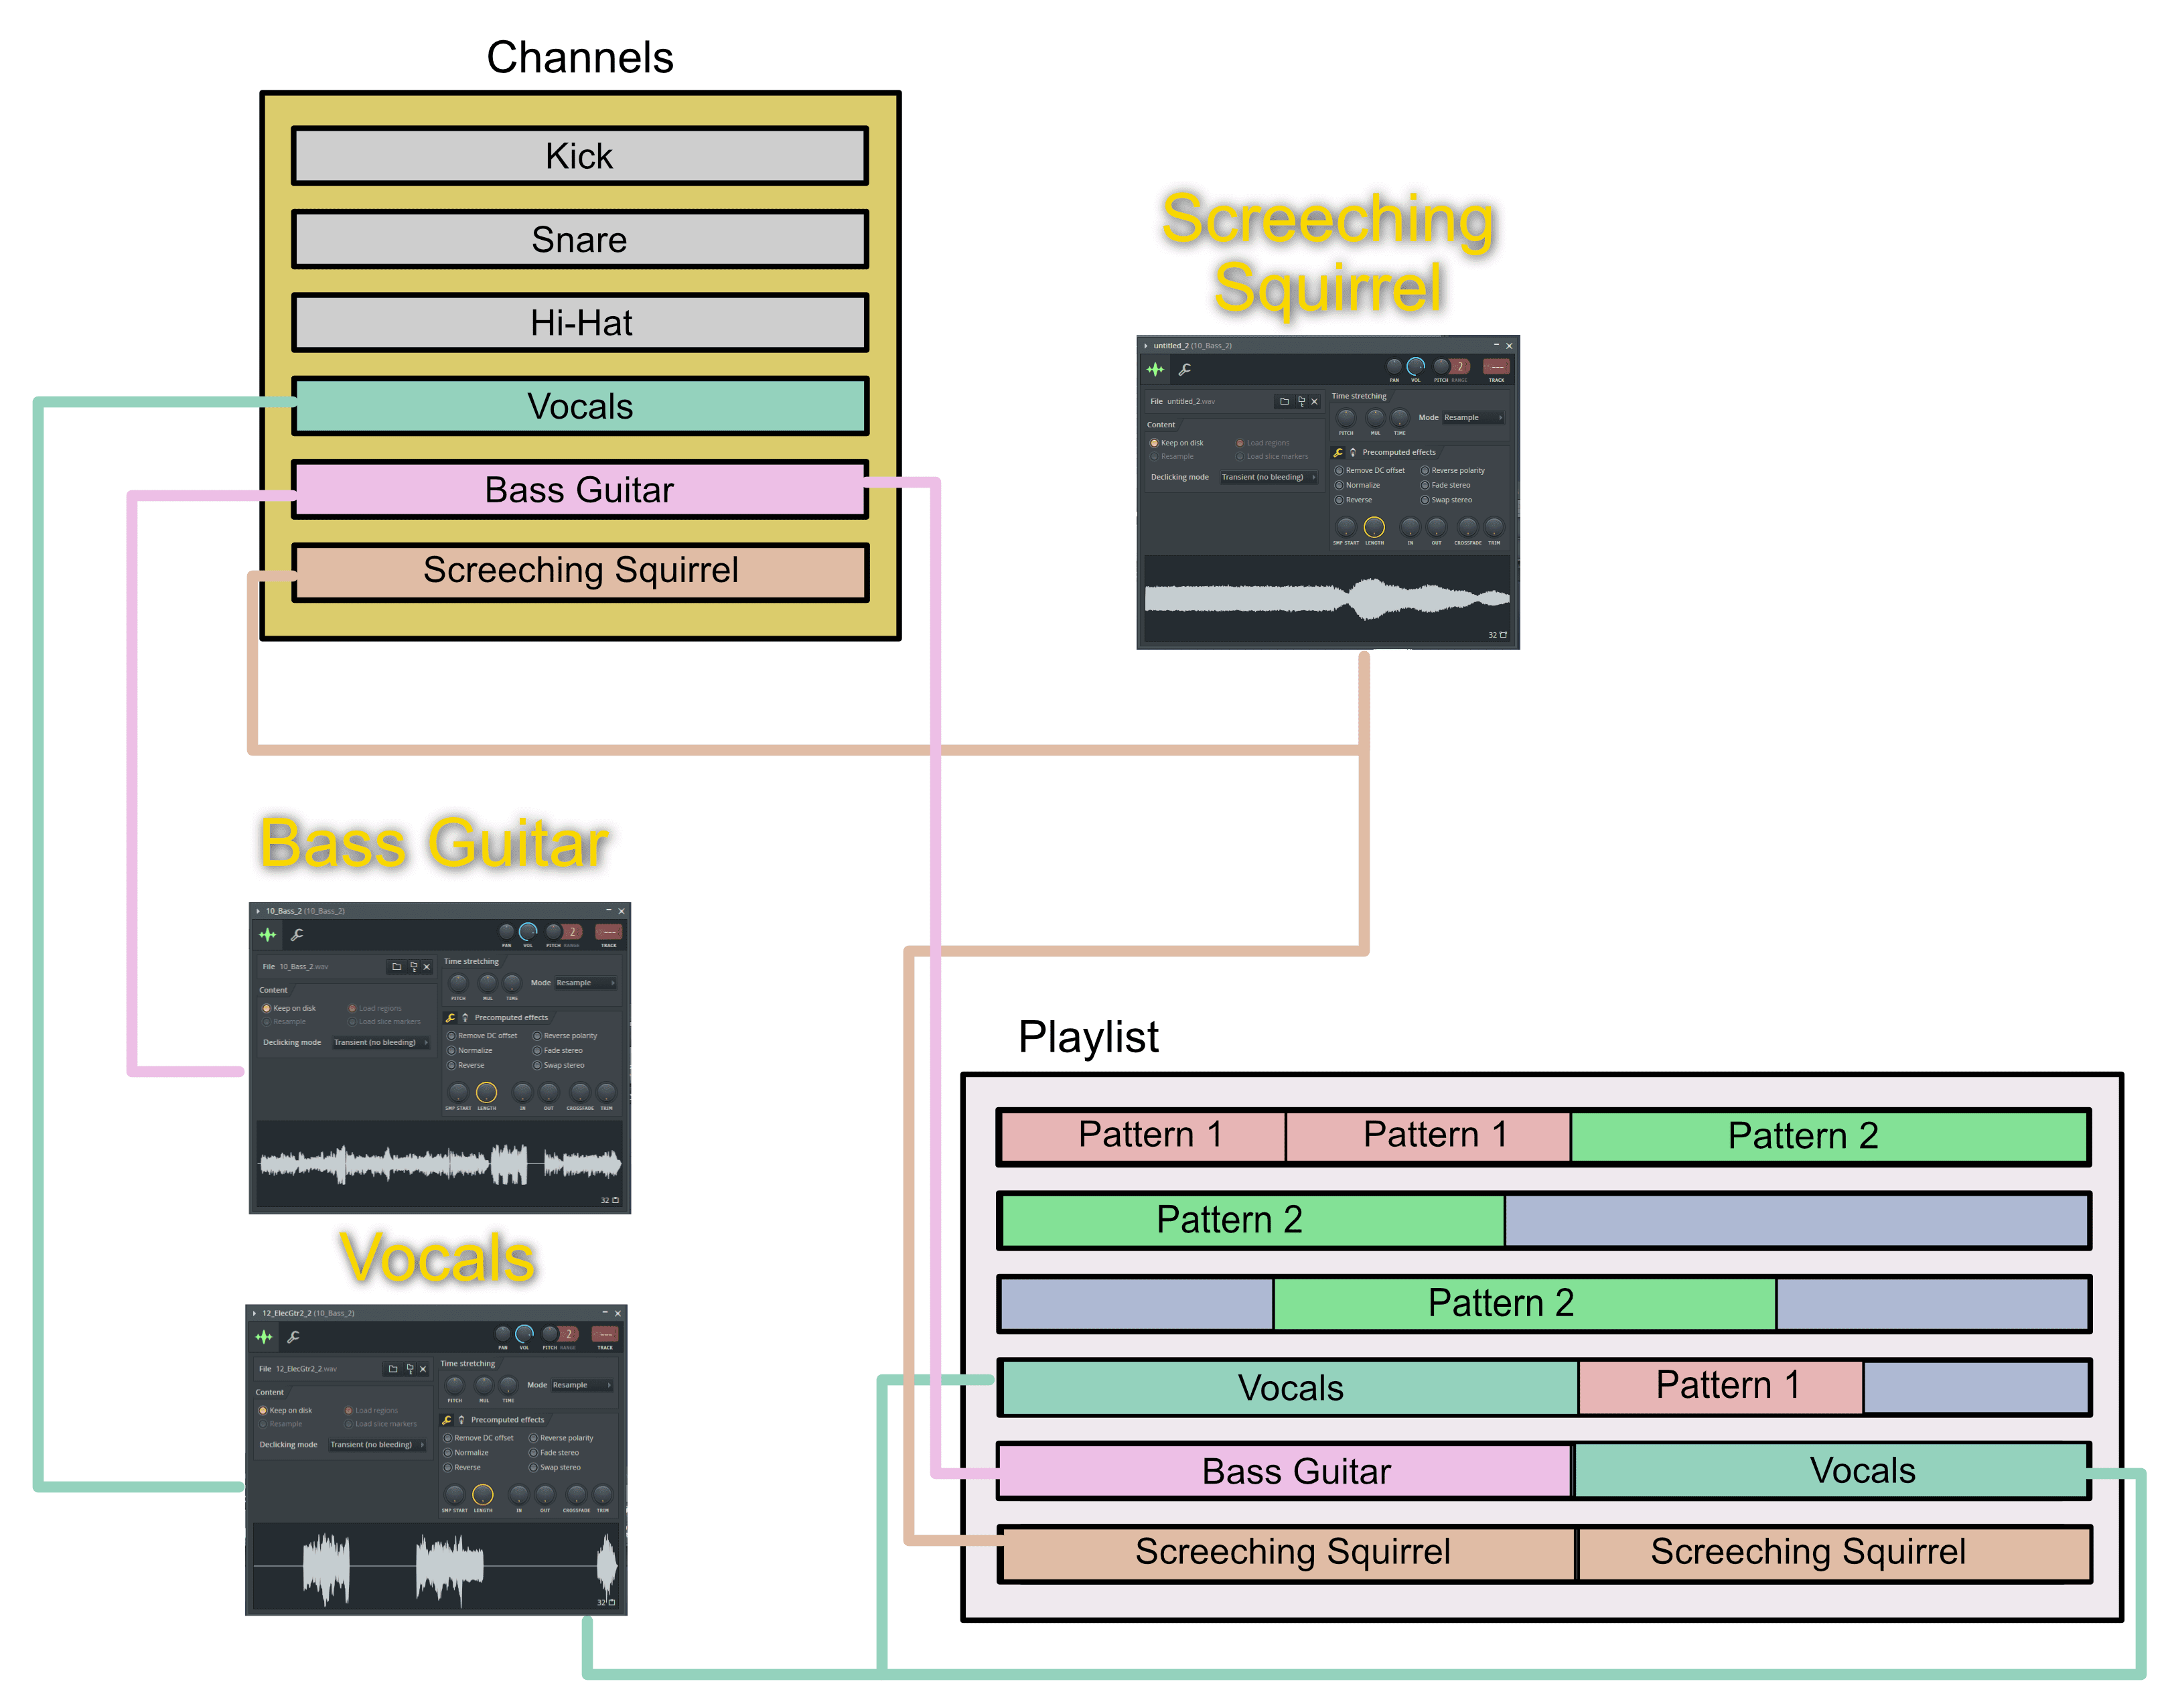
FLStudio does things in a way which can seem a bit strange to anyone used to another DAW, so the very first thing in a review is to cover how FLStudio does things.
FLStudio's workflow is most certainly different, but I think that you'll find that it offers a lot of flexibility that's not present in other DAWs. The question is whether you're willing to pay for that flexibility by having to re-arrange how your brain works...
Or if you're a new DAW user, there's really no downside.
p.s. I forgot to mention in the announcement (I've edited it now) that this review is being done with a free NFR copy of FLStudio and all Image Line products.
Other posts in this series:
30 days with FLStudio 20 - Part 0: Introduction to this series
Let's Talk About Me and My Future
No, I'm not dying. Not anymore than most of us are.
However, I do have to recalibrate my goals, professional interests and how I spend my time. Click through for a post largely about me, what I deal with on a daily basis and how it's affecting my future.
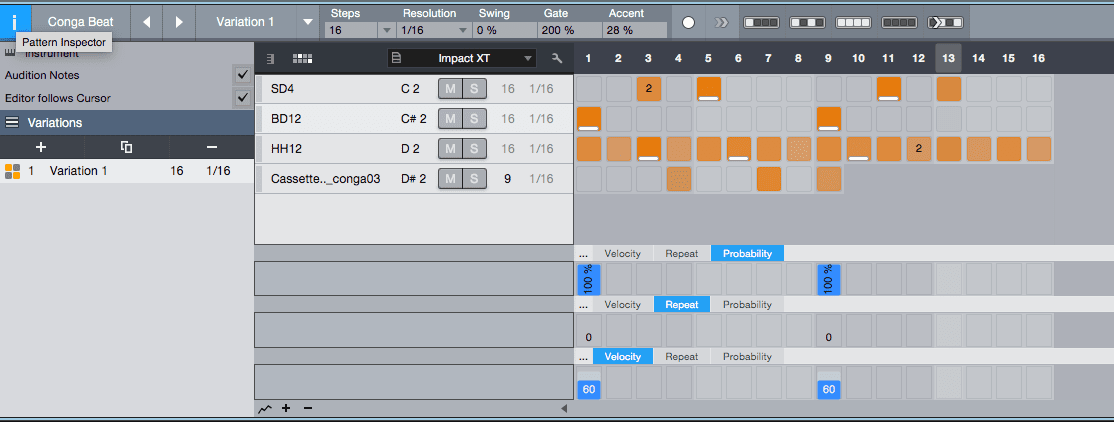
Automation Regions in Studio One
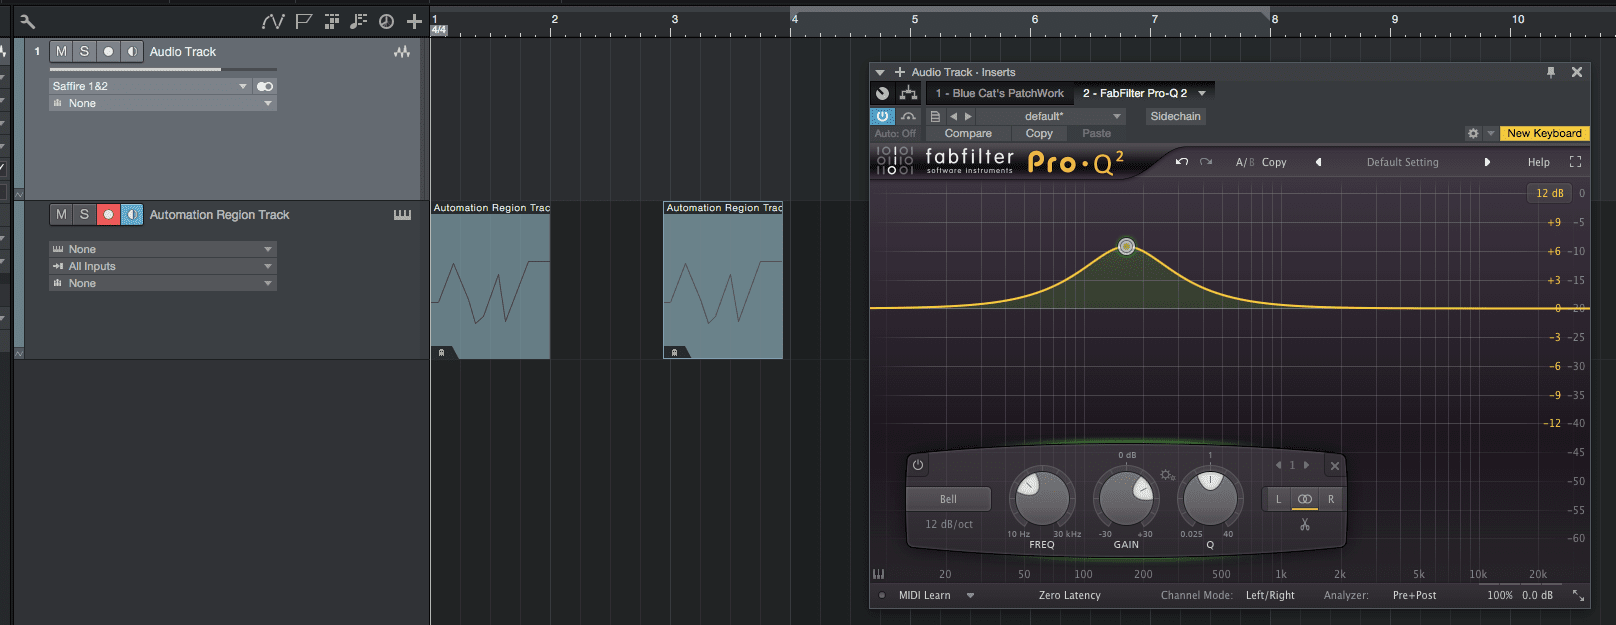
Automation Clips/Items/Regions/Whatever are a neat concept that some other DAWs have. It allows you to contain automation data in a region so it can be easily moved around and/or linked to other regions.
Studio One doesn't have this feature natively, but years ago I figured out a workaround. I just realized last night that I never wrote about it, so here we go!
The following is a tutorial on how to emulate 'Automation Clips' or 'Automation Items' in Studio One.
Make your own Wood Block
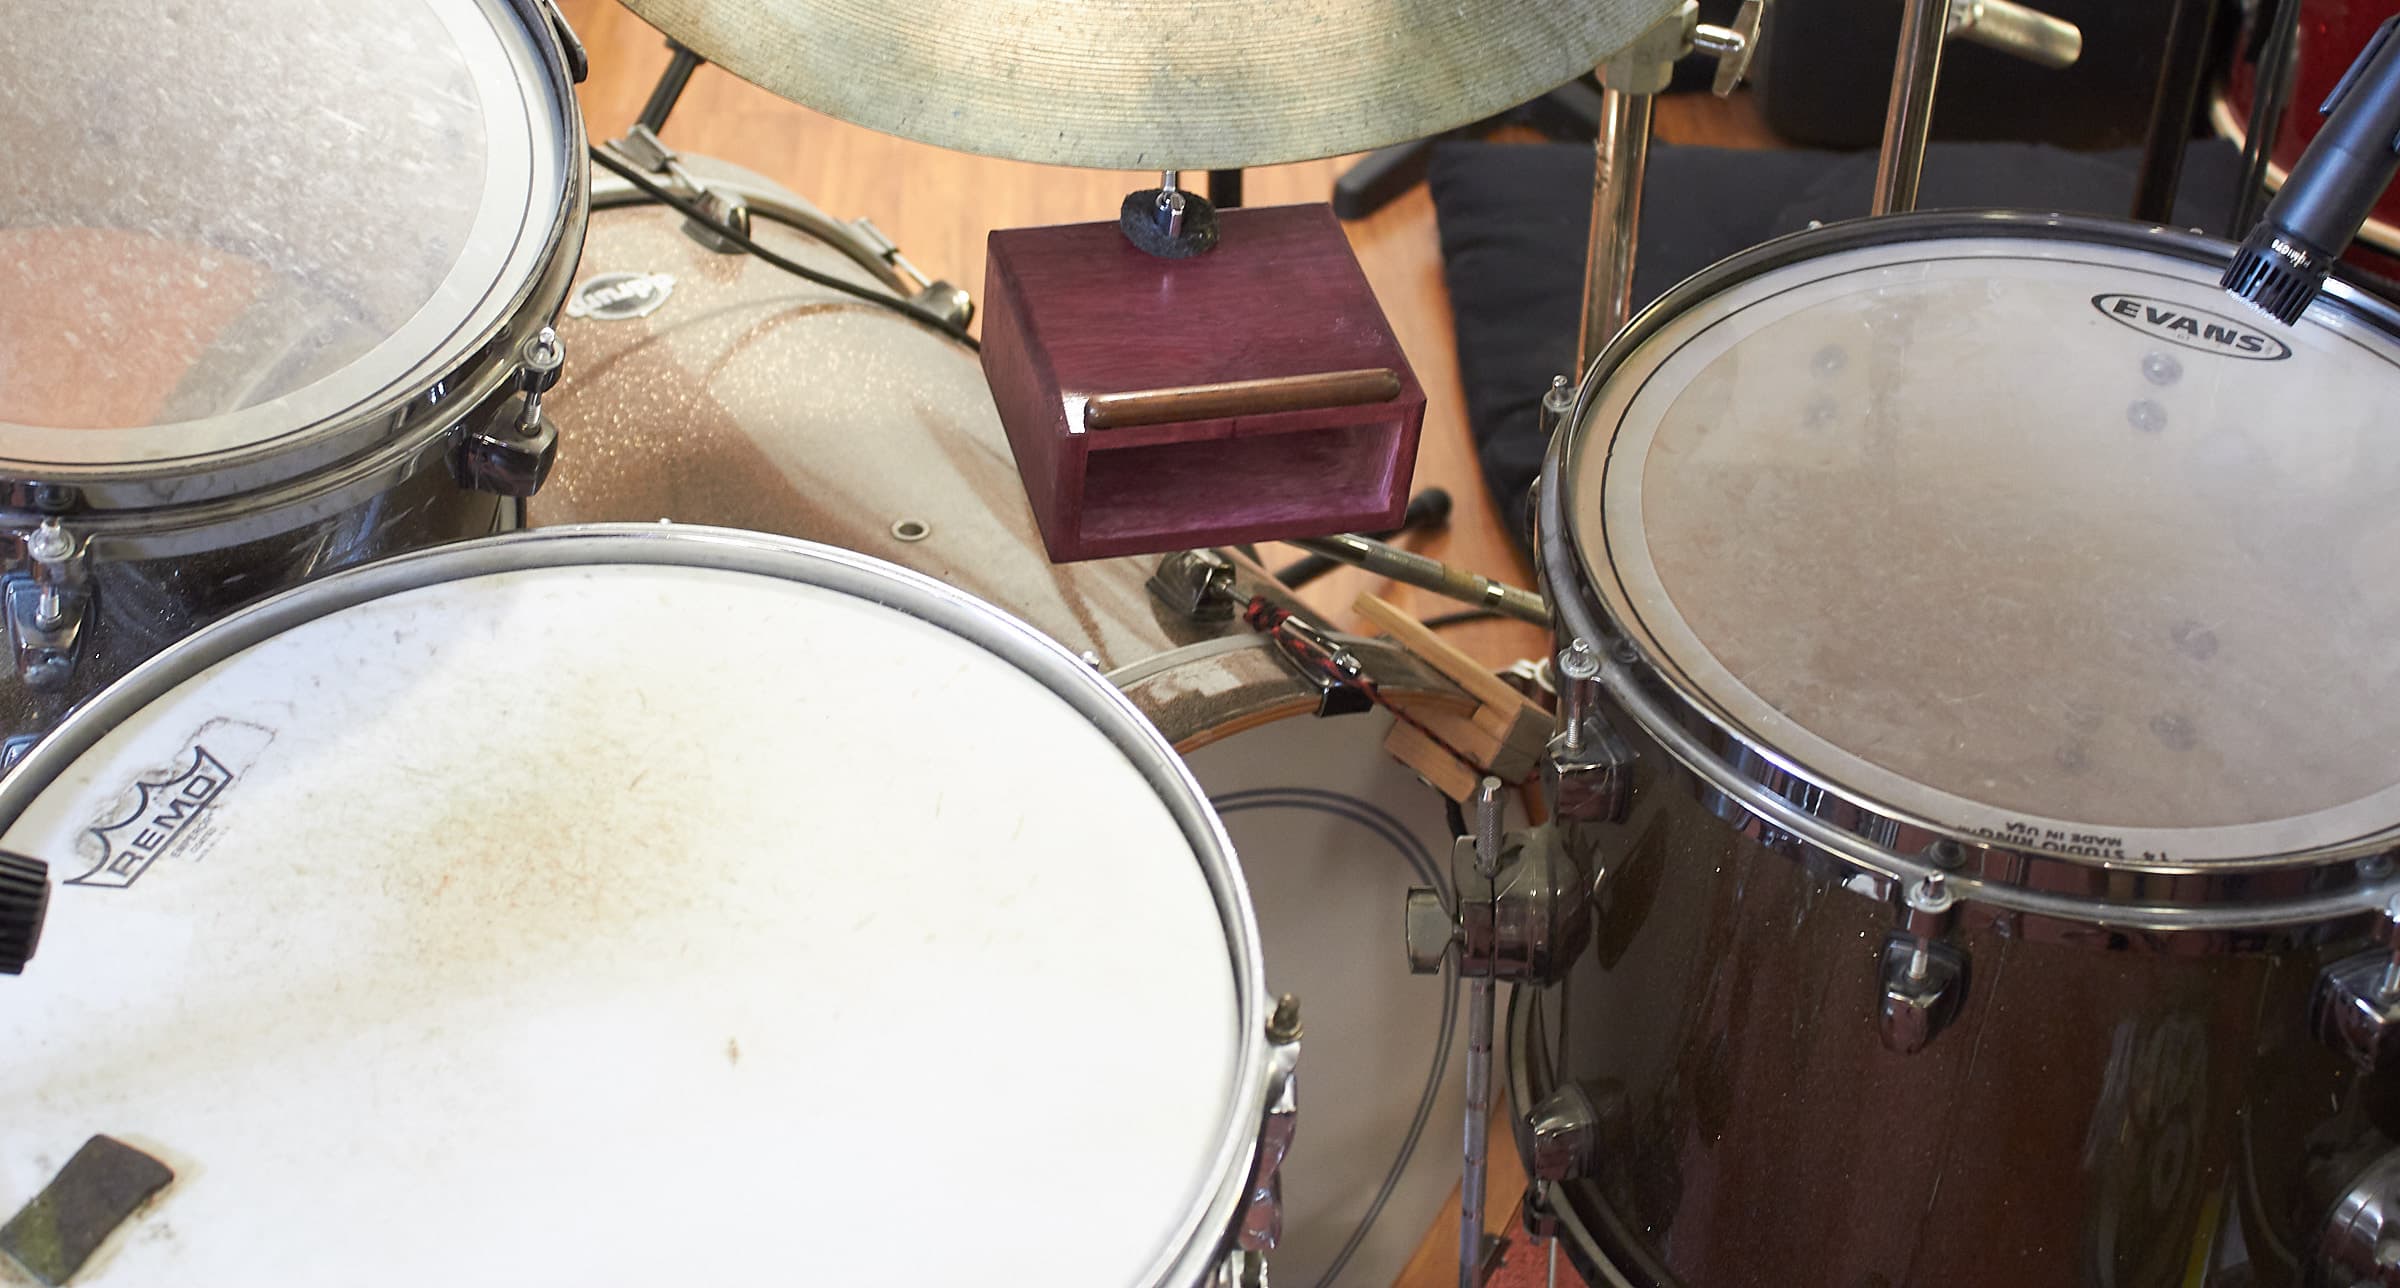
Wood blocks are cool. There's many ways to make them, and many types and shapes.
I'm going to go through two methods of making one appropriate for use with a drum set: minimal tools and 'appropriate' tools.
At minimum all you need is a block of wood, a drill and a chisel. You can even substitute a screwdriver and file for the chisel. Anyone can do this!
The design I'm using was created through testing various shapes/styles of wood blocks until I found something that I felt was at home on a full sized drum kit.
So let's get to it!
DIY Drum Triggers in Reaper
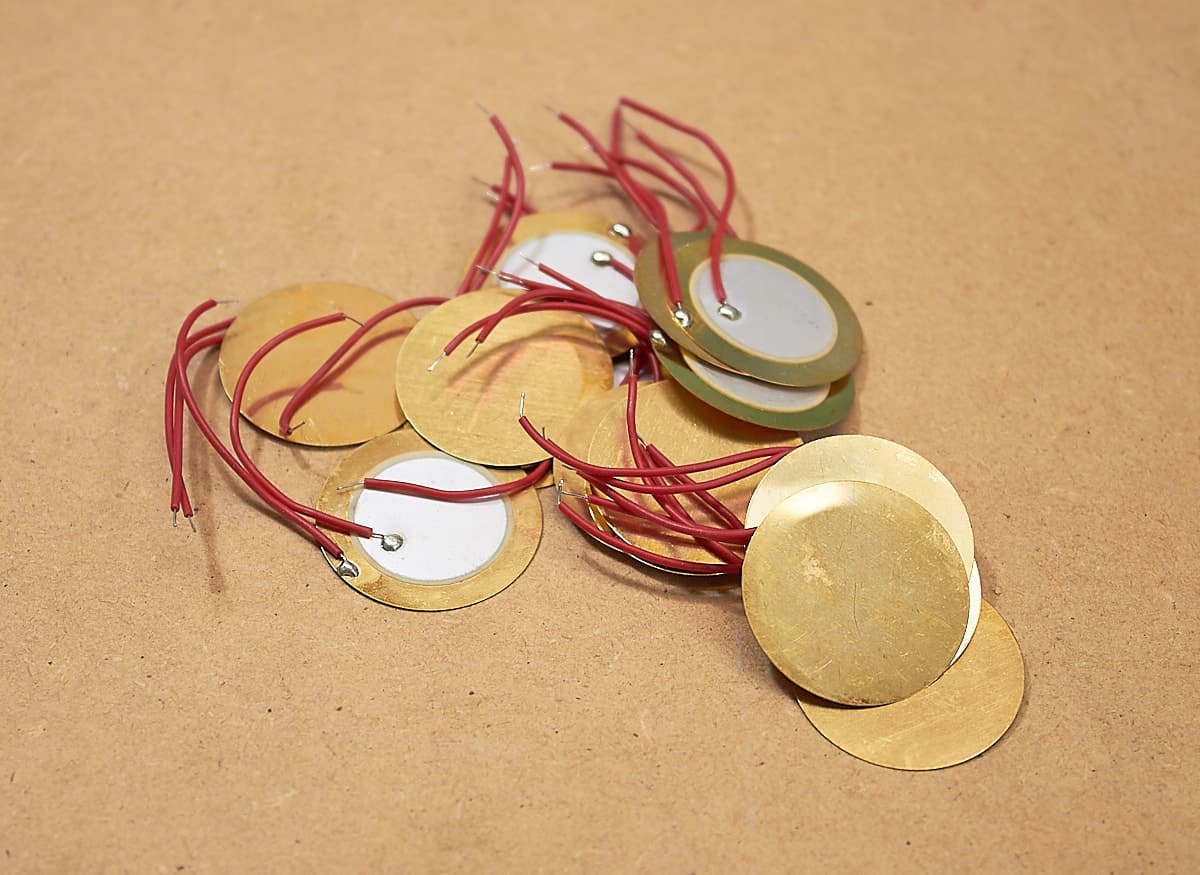
I often need to use drum triggers. Drum triggers are basically a type of transducer that is applied directly to a drum head. This gives you an isolated signal, without leakage from other instruments, that you can use to convert to MIDI and trigger a drum sound with a sampler.
In this post I'm going to walk you through how I do this very cheaply, and how I use the resulting trigger signal in Reaper.
YOU DON'T NEED DRUMS TO DO THIS!! You can trigger anything. A desk. A lamp. A mousepad. Your wife's belly. A floor pad. Anything you can hit/tap/punch/stomp or impact, you can "Trigger".
On with it!
Studio One 4
Studio One 4 has been released and I'm sure there's a lot of folks expecting me to do a 30 days with it, or an exhaustive review.
I won't be doing that. I did have a post half-prepared, but as I was working on fleshing it out and doing some extra research, I realized that there's people out there with great content on this already.
So what I'm going to do is list some content that I think is great, then go over some things that I particularly like/dislike. This won't be a complete review.
10 Axiom Presets and how I made them
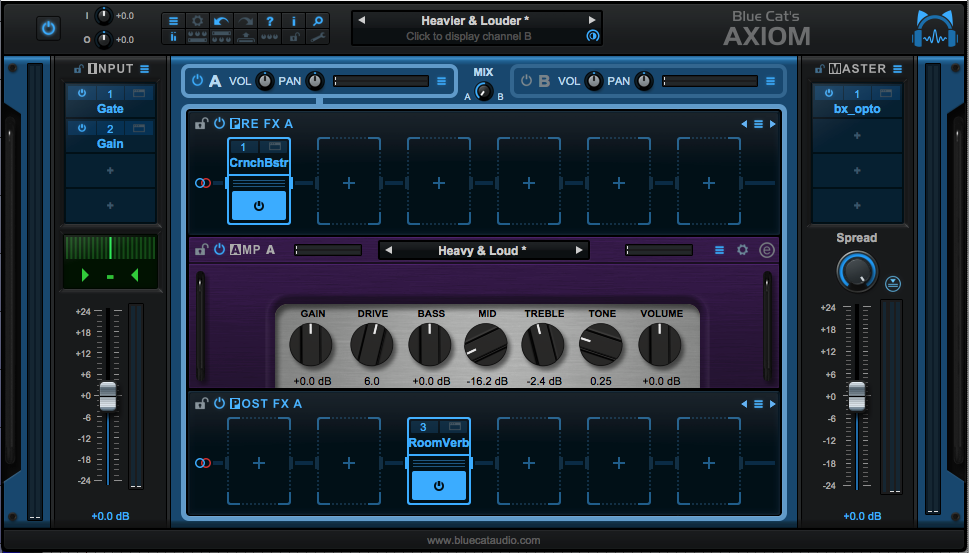
In my Axiom Review I complained about the presets. One of the fine fellows at Blue Cat more or less told me to "put up or shut up" in a very kind way, and (s)he was totally right in doing so.
I didn't actually give a good constructive summary of how to improve the presets, or how a user could create patches suited to their tracks.
Not all of these are guitar sounds!
So that's what I'm doing today. I have 10 presets here for Axiom that I took from "real sessions". I'm going to explain how to use them, how I came to the settings I used, and the tricks I use when utilizing Axiom.
A lot of these tips apply directly to Blue Cat Destructor as well.